DNX775RVS Basic Operations Guide
Basic Operations
Functions of the Buttons on the Front Panel

| Note: The panels shown in this guide are examples used to provide clear explanations of the operations. For this reason,they may be different from the actual panels. |
| Number | Name | Motion |
| 1 | Remote Sensor | Receives the remote control signal |
| 2 | Volume |
Adjusts the volume. The volume will go up to 15 when you keep pressing up. |
| 3 | NAV | Displays the navigation screen. |
| 4 | Home |
Displays the HOME screen (P.11). Pressing for 1 second turns the power off. When the power is off, turns the power on |
| 5 | Menu |
Displays the popup menu screen. Pressing for 1 second switches view camera display on/off.
|
| 6 |  |
Displays the APP (CarPlay/ Android Auto/ WebLink) screen. Pressing for 1 second displays the Voice Recognition screen |
| 7 |  |
Displays the Angle Adjust screen.
When the panel is opened, pressing closes the panel. To forcibly eject the disc, press it for 2 seconds and then touch [DISC EJECT] after the message is displayed. |
| 8 | Disc Insert Slot | A slot to insert a disc media |
| 9 | SD Card Slot |
A slot to insert an SD card. You can play audio/visual files in the card. An SD card slot for upgrading the map. For how to upgrade the map, refer to the instruction manual of the navigation system. If the map update file remains in the SD card, you cannot play audio/visual files. Do not pull out the MAP SD while "Loading Maps" is being displayed |
Turning on the Unit
The method of turning on is different depending on the model.
- Press the HOME button.

- The unit is turned on.
- To turn off the unit:
- Press the HOME button for 1 second.
| Note: If it is your first time turning the unit on after installation, it will be necessary to perform Initial setup |
Initial Settings
Initial Setup
- Set each item as follows.

- Locale
Select the country for the navigation system. The language, the distance unit, and the gasoline unit are set.
- Touch Locale.
- Select the desired country.
- Language
Select the language used for the control screen and setting items. Default is “American English (en)”.
- Touch Language .
- Touch Language Select.
- Select the desired language.
- Touch

- Display
Set the button illumination color. If it is hard to see the image on the screen even, adjust the viewing angle.
- Touch Display .
- Touch Key Color .
- Select the desired color.
- Touch .
- Touch Viewing Angle.
- Select an angle
- Touch .
- Camera
Set the parameters for the camera.
- Touch Camera.
- Set each item and touch .
- OEM SETUP
This function requires a commercial adaptor. Consult your KENWOOD dealer for details.
- DEMO
Set the demonstration mode. Default is “ON”.
- Touch DEMO and set ON or OFF.
- Touch Finish.

| Note: These settings can be set from the SETUP menu. |
Calendar/clock settings
- Press the MENU button.
- Popup menu appears
- Touch SETUP.

- SETUP Menu screen appears.
- Touch User Interface.

- User Interface screen appears.
- Set each item as follows. Scroll the page to show the item.

- Clock
NAV-SYNC (Default): Synchronizes the clock time with navigation GPS data.
Manual : Sets the clock manually.
- Time Zone
If you have selected Manual for Clock, select the time zone.
- Clock Adjust
If you select Manual for Clock, adjust the date and time manually.
| Note: Please set the date and time. If it is not set, it may not work with some functions. |
Adjusting the Volume
To adjust the volume (0 to 40), Press  to increase, and press
  to decrease. Holding
  increases the volume continuously to level 15.

Monitor Angle Control
You can adjust the position of the monitor.
- Press the
 button.
- Angle Adjust screen appears.
- Select a below number that represents your desired angle setting. Default is “0”

- Off Position: You can store the current monitor angle as the angle during power off. Touch Memory when the desired angle is selected.
Touch Screen Operations
To perform operations on the screen, you need to touch, touch and hold, flick or swipe to select an item, display setting menu screen or to change the page, etc.
| Touch: Touch the screen gently to select an item on the screen. |  |
| Touch and hold: Touch the screen and keep your finger in place until the display changes or a message is displayed. |  |
| Flick: Slide your finger quickly to the left or right on the screen to change the page. You can scroll the list screen by flicking the screen up/ down. | 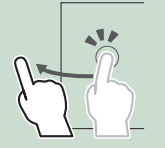 |
| Swipe: Slide your finger up or down on the screen to scroll the screen. |  |
HOME Screen Descriptions
Most functions can be performed from the HOME screen.

| 1 |
|
| 2 |
|
| 3 |
|
| 4 |
|
| 5 |
|
| 6 |
|
| 7 |
|
 or flicking left or right on the widget area.
Display the HOME
- Press the HOME button.

- HOME screen appears.
Popup Menu
- Press the MENU button.

- Popup menu appears.
- Touch to display the popup menu.

The contents of the menu are as follows.
 |
|
 |
|
 |
|
 |
|
 |
|
 |
|
 |
|
 |
|
 |
|
Source Selection Screen Descriptions
You can display all playback sources and options on the source selection screen.

| 1 |
|
| 2 |
|
| 3 |
|
| 4 |
|
| 5 |
|
Select the playback source
- Touch
 on the HOME screen. From the screen, you can select the following sources and functions.
 |
|
 |
|
 |
|
 |
|
 |
|
 |
|
 |
|
 |
|
 |
|
 |
|
 |
|
 |
|
 |
|
 |
|
 |
|
 |
|
| Note: When iPhone compatible with CarPlay is connected, Apple CarPlay is displayed. When an Android device compatible with Android Auto is connected, Android Auto is displayed. | |||
To select the playback source on the HOME screen:

The 3 items displayed on the source selection screen as the large icons are shown on the HOME screen. You can change items displayed on this area by customizing the source selection screen.
To select the playback source on the source control screen

Display source selection buttons by touching  or flicking left or right on the source control screen, then select a playback source.
Put the unit in standby
- Touch on the HOME screen.
- Touch STANDBY.

Customize Short-cut buttons on HOME screen
You can arrange the position of the source icons as you like.
- Touch on the HOME screen.
- Touch and hold the icon which you want to move to go into the customizing mode.
- Drag it where you want to move.

Changes the page

Source Control Screen descriptions
There are some functions which can be operated from most screens.
|
|
|
|
|
|
|
|
|
|


 : Lights up when quick charging battery of the connected iPod/ iPhone/ Smartphone.
 All sources icon
 Secondary screen
List Screens
There are some common function keys in the list screens of most sources.

|
|
Keys with various functions are displayed here.
|
|
|
You can change the page to display more items by pressing
|
|
|
|
| Note: Buttons which cannot be activated from the list screen are not displayed. | |


 Plays all tracks in the folder containing the current track.
 Jump to the letter you entered (alphabet search).
 Moves to the upper hierarchy.
 Page Scroll
 .
. Displays the top or bottom page.
 Text Scroll
 Return
Navigation Operation
For details on the navigation function, please refer to the Navigation Instruction Manual.
Display the navigation screen
- Press the NAV button.

- The navigation screen appears.
- Touch

- Main Menu screen appears.
How to Use the Navigation System
- Operate the desired function from the Main Menu screen.
 |
 GPS satellite strength. GPS satellite strength. |
 Finds a destination. Finds a destination. |
|
 Views the map. Views the map. |
|
 Uses the Apps such as ecoRoute and Help. Uses the Apps such as ecoRoute and Help. |
|
 Adjusts the settings. Adjusts the settings. |
|
|
Note: You can get additional information about using the navigation system from Help. To display Help, touch Apps and then touch Help.
|
|

- Enter your destination and start the guidance. Finding points of interest
- Touch Where To?
- Select a category and a subcategory.
- Select a destination.
- Touch Go!
| Note: To enter letters contained in the name, touch the Search bar and enter the letters. |
- Follow your route to the destination. Your route is marked with a magenta line. As you travel, your navigation system guides you to your destination with voice prompts, arrows on the map, and directions at the top of the map. If you depart from the original route, your navigation system recalculates the route.
| Note: The speed limit icon feature is for information only and does not replace the driver’s responsibility to abide by all posted speed limit signs and to use safe driving judgment at all times. Garmin and JVC KENWOOD will not be responsible for any traffic fines or citations that you may receive for failing to follow all applicable traffic laws and signs. |
 |
 Views the Next Turn page or the junction view page, when available. Views the Next Turn page or the junction view page, when available. |
 Views the Turn List page. Views the Turn List page. |
|
 Views the Where Am I? page. Views the Where Am I? page. |
|
 Stops the currents route. Stops the currents route. |
|
 Displays traffic information on the route. Displays traffic information on the route. |
|
 Returns to the Main menu. Returns to the Main menu. |
|
 Displays a different data field. Displays a different data field. |
|
 Views the Trip Computer. Views the Trip Computer. |
|
 Displays more options. Displays more options. |
|
| Note: Touch and drag the map to view a different area of the map. A speed limit icon could appear as you travel on major roadways. | |
- Adding a stop
- While navigating a route, touch
 and then touch Where To?
 - Search for the extra stop.
- Touch Go!.
- Touch Add to Active Route to add this stop before your final destination.
- Taking a detour
- While navigating a route, touch
 .
. - Touch
 .
.
- Manually avoiding traffic on your route
- From the map, touch
 .
. - Touch Traffic On Route .
- If necessary, touch the arrows to view other traffic delays on your route.
- Touch > Avoid.
- Viewing the traffic map
- The traffic map shows color-coded traffic flow and delays on nearby.
- About traffic
- Traffic service is not available in some areas or countries.
- Garmin and JVC KENWOOD are not responsible for the accuracy or timeliness of the traffic information.
- You can receive INRIX traffic information and weather forecast by connecting your iPhone or Android smartphone in which the “KENWOOD Traffic Powered By INRIX” application is installed. For details, see “KENWOOD Traffic Powered By INRIX” application.
- Updating maps: You can purchase updated map data from Garmin.
- Go to www.garmin.com/kenwood.
- From the Map Updates section, select Update
- Follow the on-screen instructions.
Navigation Setup
- Press the MENU button.
- Popup menu appears.
- Touch SETUP.
- SETUP Menu screen appears.
- Touch Navigation.

- Navigation SETUP screen appears.
- Set each item as follows.

- NAV Mute: Mutes the volume of rear speakers during voice guidance of the navigation system. Default is “ON”.
- NAV Interrupt Speaker: Selects speakers used for voice guidance of the navigation system.
- Front L : Uses the front left side speaker for voice guidance.
- Front R: Uses the front right side speaker for voice guidance.
- Front All (Default): Uses both front speakers for voice guidance.
- NAV Voice Volume: Adjusts the volume for voice guidance of the navigation system. Default is “24”.