14 2019 Allegro Red 360 Windows, Awnings, Vents, and Doors
Windows
Sliding windows (Figure 14-1) are custom built for the Allegro RED and allow easy sliding access to open the coach to fresh outside air

There might also be a reflective coating on the windows to reflect back a portion of the sunlight to reduce the heating of the motorhome interior and to reduce the effects of the sun’s “bleaching” of interior fabrics (curtains, upholstery).
Sun shades on both the driver and passenger’s sides can be deployed and moved at any time.
Windows throughout the coach are designated as “EXIT” windows in the event of an emergency.
To help make the windows slide more easily, we recommend using Plexus Plastic Cleaner, which can be purchased through the Tiffin Motor Homes Service Department.
Awnings
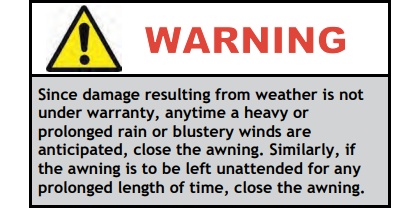
The power patio awning is extremely durable and can be operated during light rain and wind conditions. However, when periods of heavy rain, or wind is expected, or you leave the awning unattended, the awning should be closed. Please note that damage caused by wind and rain is not covered by warranty.

The power patio awning is extremely durable and can be operated during light rain and wind conditions. However, when periods of heavy rain, or wind is expected, or you leave the awning unattended, the awning should be closed. Note that damage caused by wind and rain is not covered by warranty.
To operate the awning, follow the instructions listed below.
To open the awning:
1. Locate the Remote Switch near the entry door.
2. Press and hold the EXTEND button and the awning will automatically open. If the button is released, the awning will stop. Maintain button depressed until the awning is fully extended, then release.
3. Verify that the valance is in the correct orientation (see awning instructions found in the Owner’s Information Package). Tap the rocker switch in the RETRACT direction to adjust the valance orientation if necessary. Allowing the valance to remain in the hyper-extended orientation might create a propensity to pool water, especially in larger (17’-21’) awnings.
To close the awning:

1. Locate the Remote Switch near the entry door.
2. Press and hold the RETRACT button to automatically close the awning. If the button is released, the awning will stop. Keep the button depressed until the awning is fully retracted, then release.
| IMPORTANT: As an extra safety precaution, visually verify that the awning is fully closed |
In case of awning power failure or to manually close the awning:
| IMPORTANT: This procedure will require two people. When this procedure has been performed, the awning must be serviced by a Dometic service center or a qualified service technician before using again. |
There are two methods of rolling up the awning if it appears there is no power to the awning motor. The following method should be performed first:
1. When the power awning hardware is in the open position and the 12 VDC power has been lost, the awning can be closed by supplying auxiliary power to the hardware. Connect the awning motor to an external 12 VDC power source via user-supplied wire (16 gauge minimum). A good external 12 VDC power source would be an automobile battery.
2. Locate and unplug the motor and hardware cable connection located in the upper part of the right-hand arm.
3. Connect the user-supplied wire leads to the terminals in the connector from the motor. Electrical tape might be required to keep the wire leads in place. (Do not connect to the one in the hardware).
4. Connect the other end to a 12 VDC battery source. The red wire goes to + and the black to -. If there is not a problem with the awning motor, this will retract the awning. To avoid motor damage, disconnect the battery source immediately after the awning is fully retracted.
5. The awning can be extended by reversing the polarity. Place the red wire on the - and the black wire on the +. Disconnect the battery source after the awning is fully extended.
If the awning will not retract after performing the steps listed above, perform the following steps:
1. Slide the pull strap (provided) into the utility slot of the FRTA (see awning instructions found in Owner’s Information Package).
2. While one person is holding onto the pull strap, remove the screw in the top of the right top casting. The FRTA will immediately roll in once the bolt is removed. Walk the awning to the closed position.
3. Align the hole where the screw was removed and replace the screw into the top casting to secure the awning.
| NOTE: The screw removed from top of right casting has to be reinstalled. This is to prevent the awning from opening during travel; personal injury or damage can occur. Have the awning serviced by a Dometic Service Center or a qualified service technician before attempting to open the awning after this procedure has been performed. |

Vents
The kitchen and bathroom are both equipped with a 12 VDC exhaust vent fan (Figure 14-3a). The fans can be controlled by the “Fans” screen on the Spyder Control Switch. (Figure 14-3b).

| IMPORTANT: The vent fan must be left in the ON mode only when the motorhome is parked and in use. The fan will not operate until the vent is open. |
Doors
The primary entrance door to the motorhome has a key lock and a dead bolt for additional security. When the door is fully opened, the door hinge automatically holds the door in an OPEN position.
In addition, a screen door allows increased air circulation when the entrance door is open.

